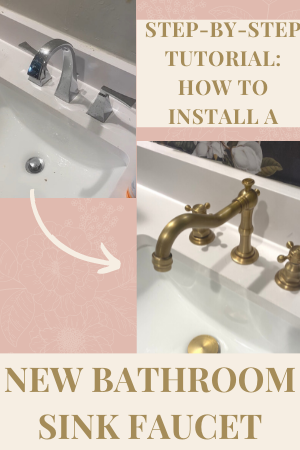
Step-By-Step Tutorial: How To Install A New Bathroom Sink Faucet
This article contains affiliate links.
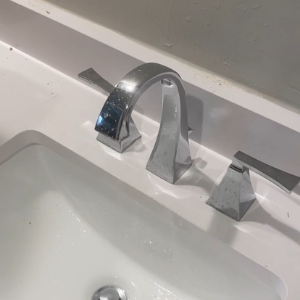
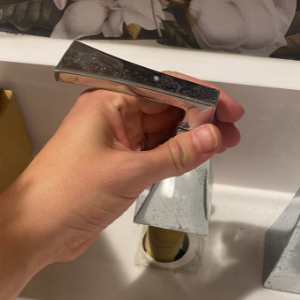
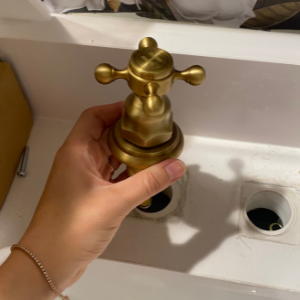
Looking for a bathroom glow up? Changing your sink faucet is an easy and inexpensive way to give your space a refresh (this is the one I used, it’s only $59.84 with the Amazon coupon and is super stylish!).
Warning: following the steps below may result in you wanting to update every sink in your home
REMOVING THE OLD FAUCET: here are the steps, but keep in mind the main goal is to turn off the water and remove everything. So it’s lots of unscrewing, removing bolts, lifting things from their holes, etc. It may seem complicated, but if you get lost… just figure out how to remove all the tubes, pipes, and hardware from the sink. Again, unscrew, unscrew, unscrew.
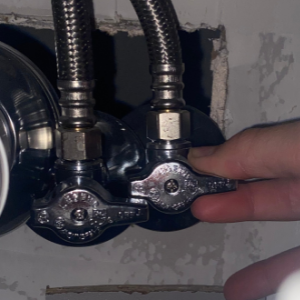
1. Turn off the water valves. Then, turn the handles (like you’re turning on the water, but none will come out) to relieve pressure.

2. Unscrew pipe connecting to drain in both spots.
3. Remove screwed on connector (that closes the drain).

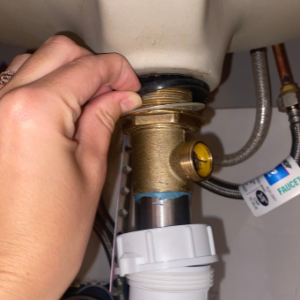
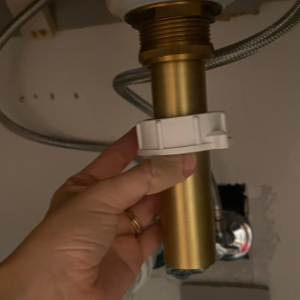
4. Use a large wrench or channel lock to loosen the drain from the bottom of the sink. Pull down black seal.
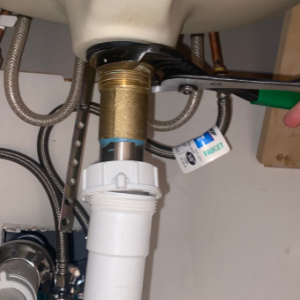
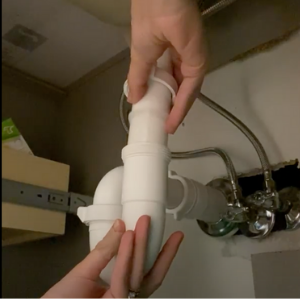
5. Gently unscrew and pull down the curved plastic piece to remove the upper white pipe from the metal pipe. Pull off the hanging white pipe. This part might get nasty!!
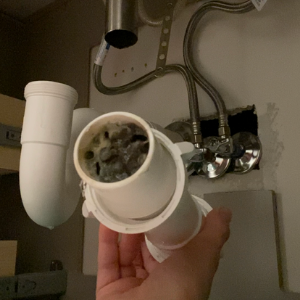

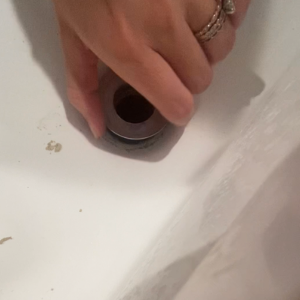
6. Stand up and remove the inside of the drain in the bottom of the sink (where your spit goes down).
7. Get back under the sink. Push up on the tube connecting to the spit hole. Unscrew the spit hole blocker. The entire bottom part and tube is now loose to pull out.

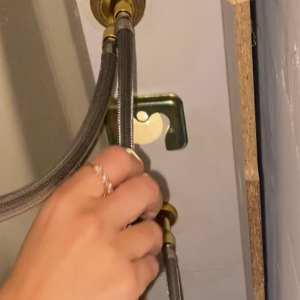
8. Remove all four connecting tubes. Two are connected to the water turn ons. Two are shapes like Fallopian tubes (yours may just be regular pipes!). Water will dribble out! Have a towel and remember your water is turned off…so don’t panic.
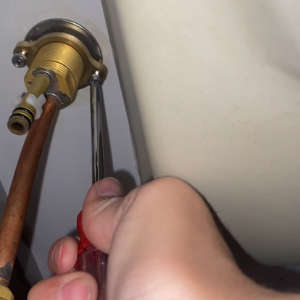
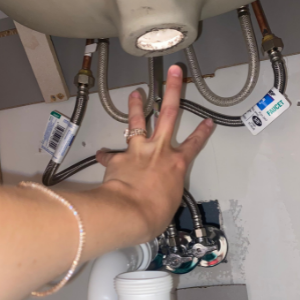
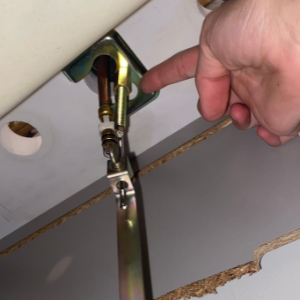
9. Squeeze your head all the way under your sink and look at where the cold and hot handles are. You may have bolts or screws attaching it to the sink. Unscrew them to remove. I had to unscrew little screws (with a small screwdriver) and then use my fingers to loosen the bolt at the top. (You’re getting there!)
10. Remove the circular screwed in pieces, stand up, and simply lift the hot and cold handles up and out of the top of the sink.
11. Let’s remove the actual faucet/water spout. Unscrew it from underneath. Remove the bolt. It’s loose! Stand up and lift the faucet out of the top of the sink.
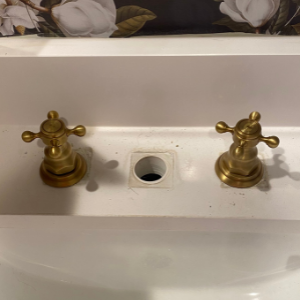
Congrats!! Your sink is naked! No going back now. You’re halfway there.
Here’s a reminder of what you’re working towards:

…it’s worth it!!
INSTALLING THE NEW FAUCET:
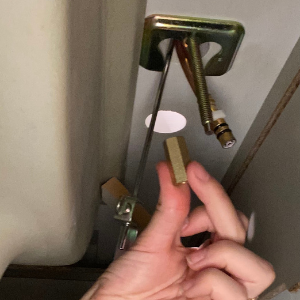
1. My set (linked here) comes with the pipes. Grab your hot and cold knobs. Screw the longer tube into the longest hole. Don’t do the shorter pipes yet. This is a trick I learned. Got both long pipes in both knobs? Okay…

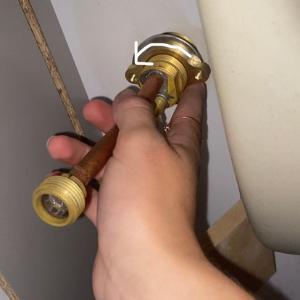
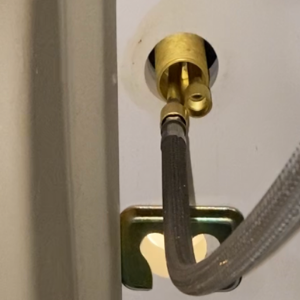
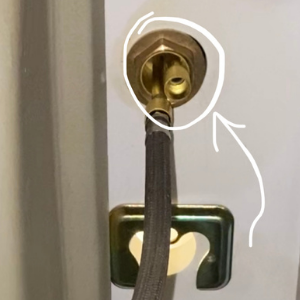
2. Unscrew the metal piece underneath the base of the knobs. Completely remove it (you’ll have to slide it off the long pipe you just screwed in).
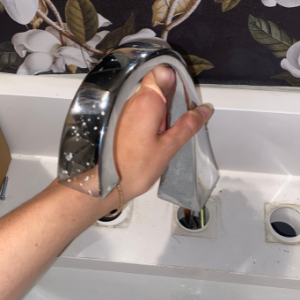
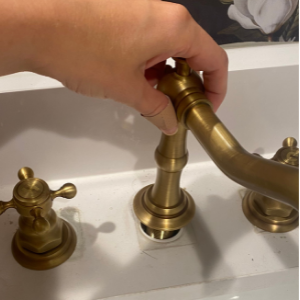
3. Place both hot and cold knobs and the long tubes into their holes on the top of the sink.
Ahhhh, it’s already looking good!!!
4. Grab that metal piece you just screwed off in step two. Get under the sink and put them back where they came from. Over the long pipe and really tight to hold the knob in place. If you can phone a friend or bribe a buddy, now's the time. It’s hard to be underneath the sink and not let the knobs move while you’re screwing.
5. Once you’ve got the metal piece back on both knobs under the sink, screw in the shorter pipes in the shorter hole.
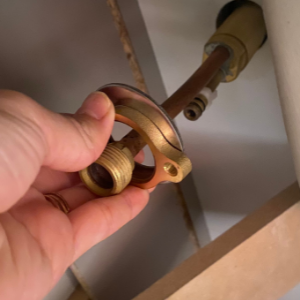
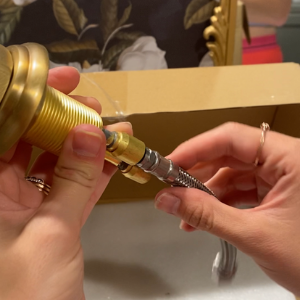
6. Grab the faucet! Unscrew both metal pieces (and black circle) from the pipe on the bottom. Place the faucet in the hole on the sink. Crawl back into the pit of despair underneath the sink.
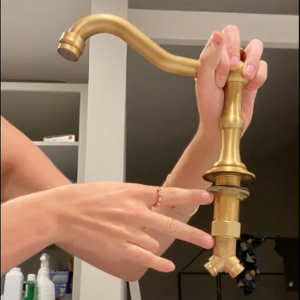

7. Screw both pieces back in. The black washer (circle piece) goes on top. Then the metal circle. Screw them to the top.

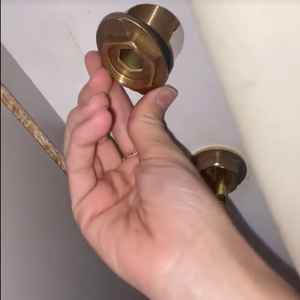
8. Screw back on the piece that kinda looks like a torso with short legs:
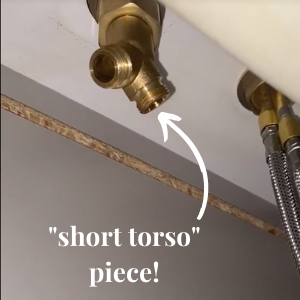
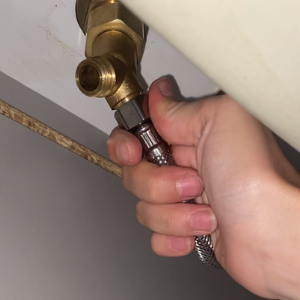
9. Make sure the faucet is straight. Now, you can connect the shorter tubes into the corresponding sides of that “torso” looking piece.
10. Now grab the longer tubes and screw them into the water valved you turned off way back in the beginning before your arm muscles were throbbing and you were considering murdering your DIY partner.
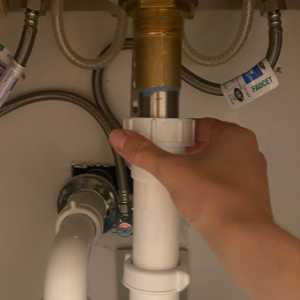
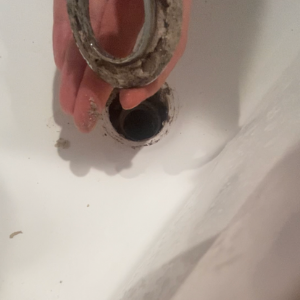
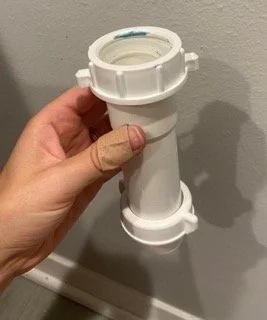
11. Get back up. Grab the new drain part from the box. Take off the plastic cap. LEAVE the white and plastic/clear pieces at the top. Screw off the bottom parts.
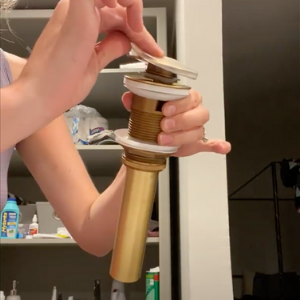
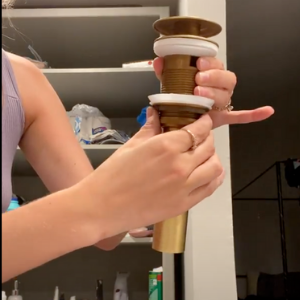
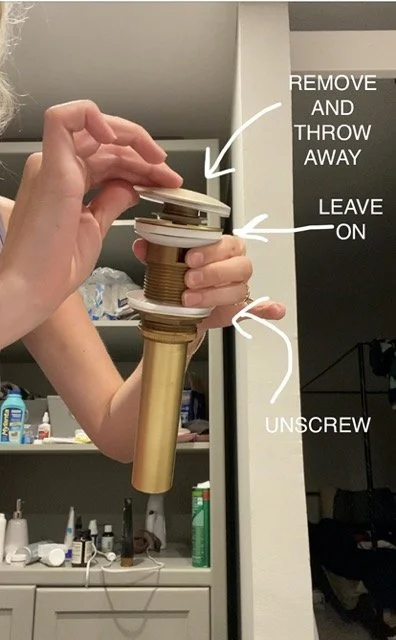
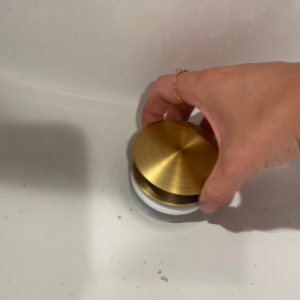
12. Set the upper part in the hole in the sink.
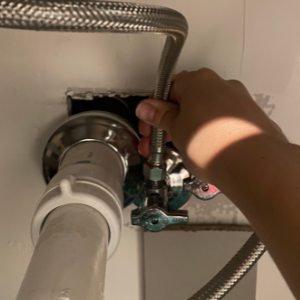
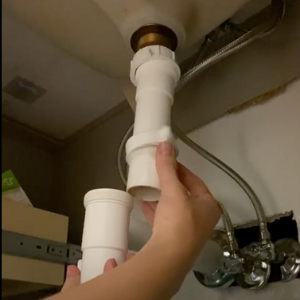
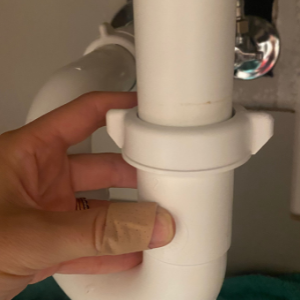
13. Screw these three pieces back on the drain pipe under the sink. In this order:


14. Now screw in the longer bottom pipe that you removed in step 10.
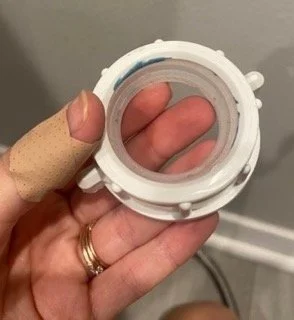
15. Grab this plastic piece you removed in the beginning. Make sure the clear piece is still in the correct way as pictured here:
16. Shove it up the pipe.
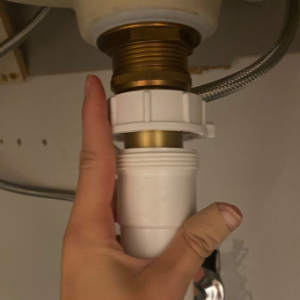
Now grab the bottom part of the tube pictured here:
and place it on the long gold pipe, too.

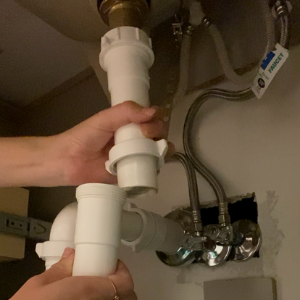
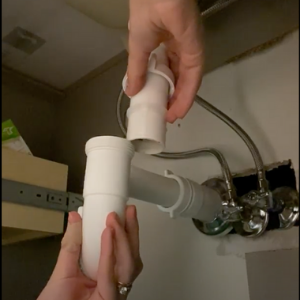
17. Revolve the curved pipe around and connect them like a puzzle piece (one inside the other). Screw them together with the plastic piece.
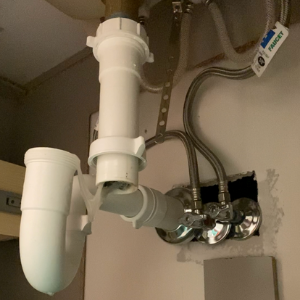
18. Now screw the top of the plastic pipe to the plastic cap at the top.
19. NOW DO A HAPPY DANCE! You’re done! Turn the water valves back on and give it a test run. Be prepared to tighten some leaky spots. I had to redo my drain because I installed it a little crooked. Just play around with any issues and solve them.
BUT YAY! We did it!!!